Introduction:
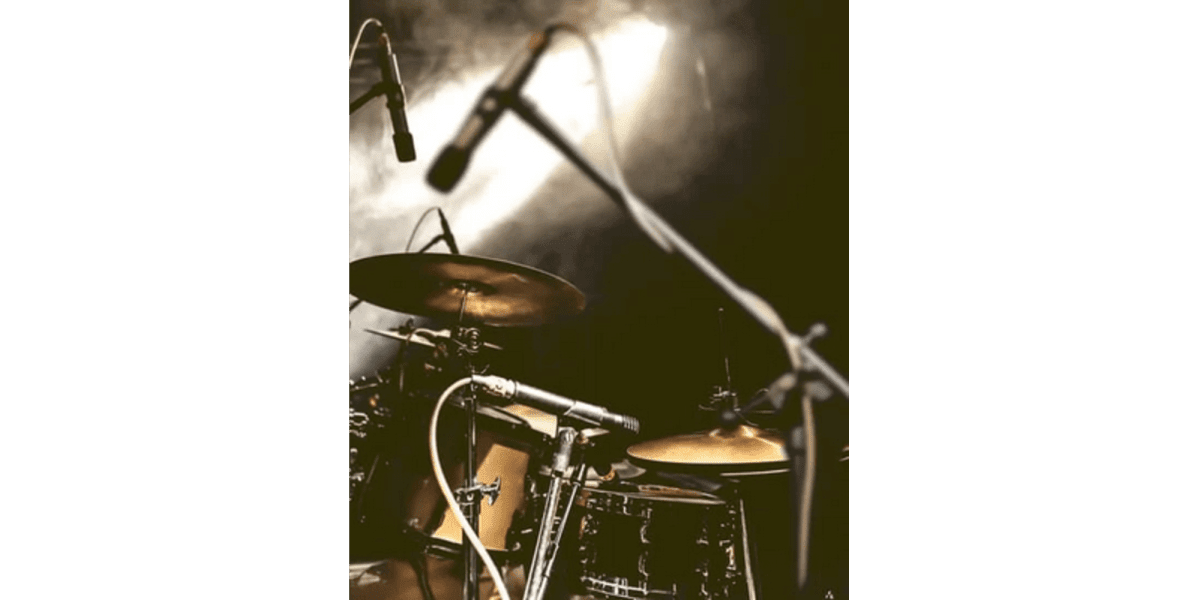
Miking a drum kit effectively is key to capturing powerful and clear recordings. By choosing the right microphones and positioning them properly, you can dramatically enhance the sound of your drums. Understanding the nuances of drum acoustics and the characteristics of different microphones will help you make informed choices for your setup.

In this blog post, I'll share essential techniques and tips for achieving optimal sound when recording drums. Whether you're working in a professional studio or setting up your gear at home, these strategies will help you get the most from your drum kit. From mic placement to utilizing advanced configurations, I want to ensure you have the knowledge to create stunning drum tracks.
Key Takeaways
- Effective mic placement is crucial for clear drum recordings.
- Selecting the right drum mics can enhance overall sound quality.
- Adjusting your setup can greatly impact the final recording.
Understanding Drum Acoustics and Microphone Types

Drum acoustics play a crucial role in how the drums sound when recorded. The choice of microphones also significantly affects the quality of the recording. I will discuss the importance of drum acoustics, different microphone types, and the characteristics of dynamic, condenser, and ribbon microphones.
The Role of Drum Acoustics in Recording
Drum acoustics refer to how sound waves travel and interact within the drum kit and the recording environment. Each drum has its own resonance and tonal qualities, influenced by factors like size, material, and shape.
For example, a kick drum typically produces lower frequencies, while a snare drum has a sharper, higher sound. Understanding these characteristics helps me choose the right microphone placement to capture their unique tones.
Room acoustics are also vital. A room with good sound treatment can enhance the recording's depth and clarity. I find that keeping these factors in mind allows me to achieve a fuller and richer sound when miking my drum kit.
Types of Microphones for Drum Recording
Choosing the right microphone is essential for capturing different elements of the drum kit. The main types of microphones I use are dynamic, condenser, and ribbon microphones. Each has unique features suited for specific applications.
Dynamic microphones are very durable and can handle high sound pressure levels, making them great for close-miking instruments like snare drums and toms.
Condenser microphones, especially large-diaphragm models, are excellent for capturing detailed sound and are often used for overhead and room miking. Small diaphragm condensers work well for cymbals and high frequencies due to their wider frequency response.
Ribbon microphones, though less common, provide a smooth and warm sound. They can work well in certain contexts, especially in controlled environments. Understanding these microphone types is key to achieving the best sound quality in recordings.
Dynamic vs. Condenser vs. Ribbon Microphones
Each type of microphone has its strengths and weaknesses. Dynamic microphones excel in handling loud sounds without distortion. They typically have a tighter polar pattern, which helps isolate the sound source, making them ideal for live settings.
On the other hand, condenser microphones are sensitive and can capture a wider frequency range. They are often favored for studio use, especially large-diaphragm models for vocals and overheads. Small diaphragm condensers provide excellent clarity and detail in higher frequencies.
Ribbon microphones are delicate and less common for drum recording, but they offer a natural sound. They typically have a figure-8 polar pattern, capturing sound from both front and back. This can be useful when I want to capture the room’s ambience along with the drum sound. Each type has its place in my recording toolkit, and choosing the right one can greatly enhance my recordings.
Strategies for Mic Placement

Effective mic placement is key to achieving the best sound from a drum kit. I will cover essential techniques for various types of miking, including basics, close miking, and overhead methods. Each approach can help capture the unique sound of each drum and the overall kit.
The Basics of Microphone Placement
When I set up microphones for a drum kit, starting with key positions is crucial. I typically place a mic on the kick drum, snare, and each tom.
For the kick drum, I often use one mic inside the drum and another outside for added depth. The snare drum usually gets a dedicated mic positioned about one inch above the rim, angled toward the center.
For toms, placing a mic just above the rim helps capture their full sound. I ensure that each mic is secure and correctly positioned to avoid unwanted noise.
Close Miking Techniques
Close miking involves positioning microphones very close to each drum. This technique helps to minimize ambient noise and emphasizes the attack of each hit. I use separate mics for the kick drum, snare, toms, hi-hat, and cymbals.
For close miking, I aim for a distance of about one to three inches from each drumhead. This captures the direct sound without interference from other instruments.
I find that use of dynamic microphones works well for snare and kick, while condenser mics are ideal for cymbals. Using the individual microphone technique allows me to have better control over the mix and sound balance.
Overhead and Room Miking
Overhead mics are vital for capturing the overall sound of the drum kit. I typically use two mics in an A/B (spaced pair) or X/Y configuration above the kit.
The A/B technique places mics about 3-4 feet above the kit to capture a wider stereo image. In contrast, the X/Y configuration positions mics close together, creating a focused stereo field.
For room miking, I set up larger diaphragm microphones in the room to capture the ambient sound. This adds depth and richness to the recording. I often place these mics several feet away from the kit, adjusting their angles to find the best tonal balance.
Essential Drum Mics and Setup

Choosing the right microphones and their setup is crucial for capturing the full sound of a drum kit. Each component of the kit benefits from specific mic options and placements to achieve the best recording quality. Here’s a guide to help you make informed choices.
Kick Drum Mic Recommendations
For the kick drum, I recommend several options that work well in different settings. The AKG D112 is a popular choice known for its clarity and punch. It performs well both inside and outside the drum. The Shure Beta 52A also provides a strong low-end response and is durable for live settings.
Another option is the Audix D6, which offers a deep low end and clear attack. I also like the Sennheiser e902 for its versatility. It captures a focused sound, making it great for recording. Placing the mic inside the kick drum or just outside the resonant head gives an effective low-end response.
Snare Drum Miking
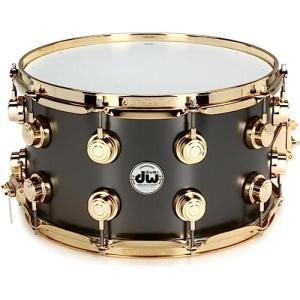
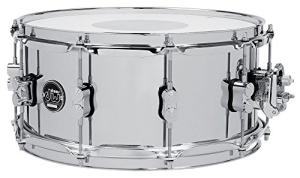
When miking the snare, the Shure SM57 is a classic choice. It captures the snare's crack and body seamlessly. For a more focused sound, I often use the Audix i5. Both mics can be positioned a few inches above the snare, angled towards the center for optimal tone.
I sometimes add a second mic underneath the snare, like the Sennheiser e604, to capture a different character. Make sure to check for phase issues when mixing signals from multiple mics. This setup allows me to blend different textures and create a richer snare sound.
Tom and Cymbal Mic Choices
For toms, I typically use the Sennheiser e604 or Audix D2/D4 mics. The e604 is compact and works well with the drumhead. It captures sound effectively without being intrusive. I place these mics a little above the rim to avoid hitting.
When it comes to cymbals, I choose the Shure Beta 98 or Rode NT5. They provide clear, crisp sound and can be used as hi-hat mics too. Proper placement is key; I position these mics higher than the cymbals to avoid excessive bleed while still capturing the full sound of the kit.
Selecting Overhead and Room Mics
For overhead mics, I often use a pair of SE Electronics V Kick or Telefunken M82 mics. They capture a broad sound stage and the balance between drums and cymbals. I set these mics in a spaced pair or a stereo configuration for greater depth.
Room mics can enhance the overall sound. I prefer using AKG C414 or similar condensers placed several feet away from the kit. This captures the drum’s natural resonance and adds depth to recordings, giving life to the mix. Adjusting the distance and angle can help shape the sound quality.
Achieving Optimal Sound with Recording Techniques
To achieve the best drum sound, I focus on a mix of direct and ambient sound, as well as ensuring proper phase management and stereo imaging. Additionally, I utilize EQ and compression during the mixing process to enhance clarity and control dynamics.
Balancing Direct and Ambient Sound
When recording drums, I pay attention to both direct and ambient sound. Direct sound comes from the microphones placed close to the drums, capturing the attack and detail of each hit. Ambient sound is picked up from mics further away, helping to create a sense of space.
For a balanced mix, I use overhead mics for capturing room sound. The XY configuration is useful here, keeping mics close together to avoid phase issues. By adjusting mic positions, I can find the sweet spot where both sounds blend well. This balance creates a more intimate sound with depth.
Managing Phase and Stereo Imaging
Phase management is crucial in drum recording. Incorrect mic placement can lead to phase cancellation, diminishing sound quality. I make sure that overhead and room mics align well with the close mics on the kick and snare.
Creating a strong stereo image is also important. I use different mic placements to achieve this effect. For instance, placing mics at varying distances can enhance ambient sound while keeping direct sounds clear. Monitoring the stereo image during recording helps me ensure that left and right channels sound cohesive.
Use of EQ and Compression in Mixing
In the mixing stage, I apply EQ and compression to refine the drum sound. EQ allows me to enhance certain frequencies. For example, I often boost the low-end for the kick drum sound and cut mids for clarity.
Compression helps control dynamics, making the overall drum sound more consistent. I tend to use a gentle ratio to avoid squashing the natural energy of the performance. By combining these tools thoughtfully, I can create a polished and impactful sound that translates well across various listening environments.
Tweaking the Drum Set for Recording
When preparing a drum set for recording, attention to detail is essential. Key factors include the selection and tuning of drum heads and making specific adjustments based on the music genre. These elements will significantly impact the sound quality captured during the recording process.
Drum Head Selection and Tuning
Choosing the right drum heads is crucial. For a punchy sound, I often use thicker heads, while thinner heads provide a warmer tone. Some popular options are:
- Coated heads: Great for a warmer, softer attack, often preferred in jazz.
- Clear heads: Offer more projection and a brighter sound, suitable for rock.
Once I select the heads, tuning is next. I ensure each drum is evenly tuned by checking the tension at multiple points on the drum. Fine-tuning each drum helps achieve the desired pitch. I often play the drums and adjust until I’m satisfied with the sound.
Adjustments for Recording Different Music Genres
Different music genres require different sound qualities. For jazz, I may tune the snare a bit lower for a warmer tone. I typically use brushes instead of sticks for a softer sound, which has less attack and blends well with other instruments.
For rock recordings, I aim for a tighter and more resonant tone. I may crank up the tension on the drum heads for added snap and clarity. For both genres, placing mics strategically helps capture the right sound. Positioning overhead mics further enhances the overall tone, ensuring it complements the style.
Adjusting the dynamics and choosing the right miking techniques are key to getting the best performance from the drum kit.
Advanced Miking Configurations
In this section, I will explore two advanced miking configurations: the spaced pair and XY setup, as well as the use of boundary and additional mics. These techniques can enhance the capture of your drum sounds, offering greater control and depth.
Spaced Pair vs. XY Configuration
The spaced pair configuration involves placing two microphones at a distance apart, often wider than the drum kit. This method creates a natural stereo field, capturing the room's acoustics. The mics should be at equal height and angled towards the center of the kit.
In contrast, the XY configuration uses two directional mics placed close together, forming an "X" shape. This setup reduces phase issues, giving a more focused sound. The advantage of XY is its compact nature and effectiveness in smaller spaces, providing a cleaner mix without room interference.
Utilizing Boundary and Additional Mics
Boundary microphones are a unique choice for capturing drums. These mics work well on surfaces like walls or floors. When placed near the kit, they capture bass response and ambient sound, enriching the overall mix.
Adding additional mics can be beneficial for isolating specific drum elements. For example, using a separate mic for the kick drum can enhance its presence. A dynamic snare mic will ensure clarity, while condenser mics can capture the shimmer of cymbals.
By combining these techniques, I can create a fuller soundstage, making my recordings more impactful and engaging.
Gear Essentials: From Microphone to Mixer
Choosing the right gear is crucial for effective drum recording. I focus on the audio interface and mixer for quality sound capture and monitoring. These components play vital roles in how I achieve the best results from my drum kit.
Choosing the Right Audio Interface and Mixer
When selecting an audio interface, I look for one that has multiple inputs. A good choice has at least 4-8 mic preamps. This allows me to record all drums separately for better control in my digital audio workstation (DAW).
Key features I consider include:
- Low Latency: This helps to avoid delays during recording.
- High Sample Rate: A sample rate of 24-bit/96kHz is ideal for capturing detailed sound.
- Phantom Power: Necessary for condenser mics.
For a mixer, I prefer options with at least 8 channels and built-in effects. This setup allows me to mix sounds live, giving each drum an equal presence in the mix.
Monitoring With Headphones and Speakers
Monitoring is a crucial step in capturing the best drum sounds. I always use closed-back headphones for tracking. They keep the sound isolated and reduce bleed from the drum kit into the microphones.
Key points for my headphone choice:
- Comfort: I often wear headphones for long sessions, so comfortable padding is essential.
- Frequency Response: A flat frequency response helps me hear the true sound of the drums.
For playback, I invest in studio monitors with a flat response. This accuracy enables me to hear the mix as it truly is. Proper placement of my monitors is also important. I position them at ear level and form an equilateral triangle with my listening position to ensure balanced sound.
Tips for Recording Drums in a Home Studio
To achieve great drum recordings in a home studio, I focus on the room acoustics and minimizing noise. These factors play a crucial role in determining the quality of my recordings.
Dealing With Room Acoustics
The sound of any recording heavily depends on the room where it takes place. In my home studio, I pay close attention to how sound travels.
-
Choose the Right Space: I select a room with minimal hard surfaces to avoid echo. Carpet, curtains, and furniture can help absorb sound.
-
Use Bass Traps: When I can, I use bass traps in the corners to manage low frequencies. This can reduce muddiness in my recordings.
-
Microphone Placement: I experiment with mic positions to find the best sound. Close-miking individual drums captures clearer tones.
-
Test and Adjust: I often record test tracks to listen for any unwanted reflections or resonances. Adjustments in positioning can make a big difference.
Minimizing Noise and Interference
To capture clean drum recordings, controlling outside noise is essential. My goal is to create the quietest environment possible.
-
Soundproofing: I put up foam panels or other soundproofing materials. This reduces outside noise and prevents sound from leaking out.
-
Isolate the Kit: If possible, I place my drum kit away from windows and doors. This helps limit interference from outside sounds.
-
Timing: I choose times when my neighborhood is quieter, like early mornings or late evenings, for recording sessions.
-
Use Direct Inputs: When connecting electronic drums or mics, I ensure that I use high-quality cables to avoid interference. Checking connections regularly helps maintain sound quality.
By incorporating these tips, I aim for professional-quality drum recordings right in my home studio.
Frequently Asked Questions
I often get questions about the best practices for miking a drum kit. Here are some common inquiries that I come across, along with clear answers.
What are the essential techniques for miking a drum kit for studio recordings?
Using multiple microphones is key for studio recordings. I recommend placing mics close to each drum to capture more detail. Focus on the kick drum, snare, and overheads to create a full sound. Adjust the levels and balance them during mixing to enhance the final track.
Can you explain the Glyn Johns miking method for drums?
The Glyn Johns method uses just a few microphones to capture a natural drum sound. I place one mic above the snare and two mics on the floor, angled towards the toms and kick. This technique creates a balanced stereo image and captures the essence of the kit.
What is the best drum miking setup for a live stage performance?
For live performances, a simple setup works best. I typically use one mic for the kick drum, one for the snare, and two overhead mics for the cymbals. This setup allows for quick adjustments and keeps the sound focused.
How can you achieve optimal drum sound with a minimal mic setup?
Using fewer microphones can still yield great results. I suggest miking the kick, snare, and using a pair of overheads. This will give you a cohesive sound without complicating the setup, making it easier to manage during recording or performance.
What does the '3 to 1 rule' mean in drum miking and how is it applied?
The '3 to 1 rule' helps prevent phase issues when miking drums. It states that the distance between microphones should be at least three times greater than the distance from each mic to the sound source. I apply this rule by ensuring that all mics are spaced correctly around the drum kit.
What are some effective drum mic placement strategies to avoid phase issues?
To avoid phase issues, I ensure that all mics are positioned carefully. I place mics equidistant from the sound source when possible. Using the '3 to 1 rule' and checking the phase alignment during sound checks can help ensure a clear and clean drum sound.
