Guide to Creating a Noise-Free Drum Studio
Are you tired of disturbing your neighbors or family members with your drumming practice? Creating a noise-free drum studio is the solution you've been looking for. In this ultimate guide, we will take you step by step through the process of soundproofing mastery, helping you create a space where you can drum to your heart's content without any worries.
Soundproofing a drum studio requires careful planning and the right techniques. From understanding the principles of soundproofing to selecting the right materials and implementing effective solutions, we've got you covered. Whether you're a beginner or a professional drummer, this guide will provide you with the knowledge and tools to successfully soundproof your drum studio.
We'll explore various soundproofing methods such as decoupling, adding mass, and damping to minimize sound transmission. You'll also learn about acoustic treatment options to improve the acoustics of your drum studio and achieve optimal sound quality.
Say goodbye to complaints and hello to uninterrupted drumming sessions. Get ready to master the art of soundproofing and create the perfect noise-free drum studio. Let's dive in!
The importance of soundproofing in a drum studio
Drumming is an exhilarating and expressive art form, but it can also be a source of significant noise that can disrupt the peace and tranquility of your living space or your neighbors' homes. Whether you're a professional drummer or a passionate hobbyist, creating a soundproof drum studio is essential to ensure that your drumming practice doesn't become a source of conflict or tension with those around you.
Soundproofing your drum studio offers numerous benefits beyond just keeping the noise at bay. It enhances the acoustics of your playing environment, allowing you to hear the true character of your drum kit and making it easier to fine-tune your technique and performance. A well-soundproofed studio also helps to minimize distractions, enabling you to focus more deeply on your craft and unleash your full creative potential.
Moreover, a soundproof drum studio can provide a safe and comfortable space for you to explore your musical passion without worrying about disturbing others. This can be particularly important if you have young children or live in a densely populated area. By taking the time to properly soundproof your studio, you can create a dedicated space where you can freely express yourself through the rhythmic power of your drumming.
Understanding sound and noise control
To effectively soundproof your drum studio, it's essential to understand the fundamental principles of sound and noise control. Sound is a form of energy that travels through the air or other mediums, and it can be transmitted through various pathways, including walls, floors, and ceilings.
When it comes to noise control, there are three primary strategies: absorption, isolation, and damping. Absorption refers to the process of reducing the amount of sound that reflects off surfaces, which can be achieved through the use of sound-absorbing materials like acoustic panels or foam. Isolation involves creating a physical barrier to prevent sound from traveling through structures, while damping focuses on reducing the vibration of surfaces that can transmit sound.
By understanding these principles, you can develop a comprehensive soundproofing plan that addresses the unique challenges of your drum studio. This knowledge will guide you in selecting the right materials and techniques to effectively minimize sound transmission and create a peaceful, noise-free environment for your drumming practice.
Assessing your drum studio for sound leaks
Before you can begin the soundproofing process, it's crucial to assess your drum studio for potential sound leaks. These are the areas where sound can escape or enter the room, compromising the effectiveness of your soundproofing efforts.
Start by carefully inspecting your drum studio, paying close attention to the walls, floors, ceilings, doors, and windows. Look for any cracks, gaps, or openings that could allow sound to pass through. Additionally, consider the construction materials used in your studio, as certain materials may be more effective at blocking sound than others.
It's also important to listen carefully for any areas where sound seems to be escaping or entering the room. You can do this by playing your drums at different volumes and listening for any noticeable sound transmission. Once you've identified the problem areas, you can begin to develop a targeted soundproofing strategy to address them.
Soundproofing materials and techniques
Soundproofing your drum studio requires the use of specialized materials and techniques to effectively block and absorb sound. Some of the most commonly used soundproofing materials include:
- Mass-loaded vinyl (MLV): A dense, flexible material that can be used to create a physical barrier to sound transmission.
- Acoustic insulation: fiberglass or mineral wool insulation that helps to absorb and dampen sound.
- Resilient channels: metal channels that are installed between the wall framing and drywall to decouple the surfaces and reduce sound transmission.
- Acoustic panels: panels made of sound-absorbing materials like foam or fabric-covered fiberglass that can be installed on walls and ceilings.
- Soundproof sealants: specialized caulks and sealants that can fill in any gaps or cracks to prevent sound leaks.
When it comes to soundproofing techniques, there are several approaches you can take, including:
- Decoupling: Separating surfaces, such as walls and floors, to prevent sound transmission through rigid connections.
- Adding mass: increasing the weight and density of walls, floors, and ceilings to make it more difficult for sound to pass through.
- Damping: applying materials that can absorb and dissipate vibrations, reducing the amount of sound that is transmitted.
By carefully selecting the right materials and employing these proven soundproofing techniques, you can create a highly effective noise-control solution for your drum studio.
Building a floating floor for noise reduction
One of the most important aspects of soundproofing a drum studio is addressing the floor. Drum kits can generate a significant amount of low-frequency vibrations that can easily transmit through a solid floor and into the surrounding structures, causing a nuisance for your neighbors or housemates.
To combat this issue, you can construct a floating floor system. A floating floor is a subfloor that is decoupled from the main floor, creating a physical barrier that prevents the transmission of sound and vibrations. This is typically achieved by installing a layer of resilient material, such as rubber or foam, between the subfloor and the main floor.
When building a floating floor, it's essential to ensure that the subfloor is completely isolated from the main floor. This means that the subfloor should not be directly attached to the walls or any other structural elements. Instead, it should "float" on the resilient material, allowing it to absorb and dampen the vibrations generated by your drumming.
Installing soundproofing panels on walls and ceilings
In addition to addressing the floor, it's crucial to focus on the walls and ceilings of your drum studio to achieve comprehensive soundproofing. Soundproofing panels, also known as acoustic panels, are a highly effective solution for reducing sound transmission and improving the overall acoustics of the space.
These panels are typically made of sound-absorbing materials, such as fiberglass or foam, and are designed to be installed directly on the walls and ceilings. By covering the surfaces of your drum studio with these panels, you can dramatically reduce the amount of sound that is reflected and transmitted through the room.
When selecting and installing soundproofing panels, it's important to consider factors such as the size and shape of your drum studio, the specific acoustic challenges you're facing, and the overall aesthetic you're trying to achieve. Some panels may be more effective at absorbing low-frequency sounds, while others may be better suited for mid-range or high-frequency noise. By working with a professional soundproofing expert, you can ensure that you choose the right panels and install them in the most strategic locations to maximize the effectiveness of your soundproofing efforts.
Sealing doors and windows for maximum sound insulation
Doors and windows are often the weakest points in a soundproofed room, as they can provide easy pathways for sound to escape or enter the space. To achieve maximum sound insulation, it's essential to pay close attention to these areas and implement effective sealing techniques.
For doors, you can start by installing a high-quality weatherstripping system that creates a tight seal around the perimeter of the door. This helps to block air leaks and prevent sound from passing through. You can also consider upgrading to a solid-core door, which is generally more effective at blocking sound than a hollow-core door.
When it comes to windows, the key is to create a complete airtight seal around the frames. This can be achieved by using specialized soundproof window inserts or by installing secondary glazing systems that add an extra layer of glass or acrylic. Additionally, you can apply soundproof caulk or sealant around the window frames to fill any gaps or cracks.
Soundproofing your drum kit and equipment
While soundproofing the physical space of your drum studio is crucial, it's also important to consider the impact of your drum kit and other equipment on the overall noise levels. By taking steps to soundproof your drumming gear, you can further enhance the effectiveness of your studio's soundproofing efforts.
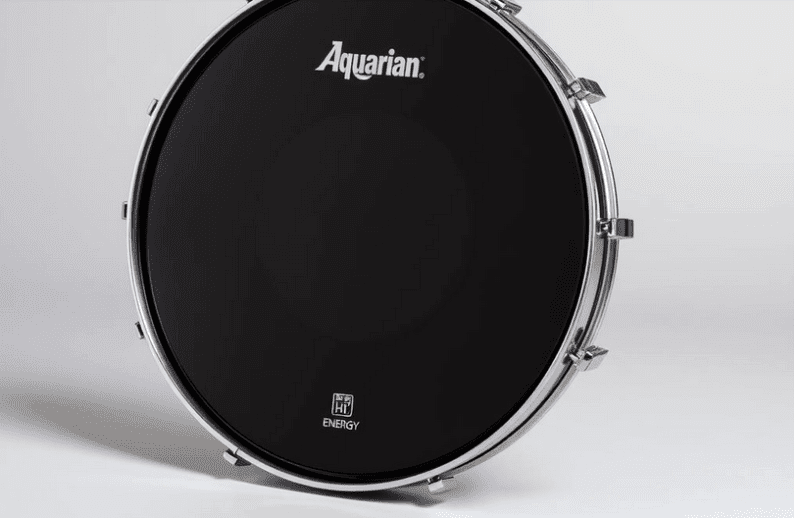
One effective approach is to use drum-dampening products, such as mufflers or damping rings, which can help to reduce the volume and resonance of your drums. These accessories work by absorbing and dissipating the vibrations generated by your drum heads, effectively lowering the overall sound output.
You can also explore options for soundproofing your drum hardware, such as using isolation mounts or pads to decouple your drums from the floor or other surfaces. This helps to prevent the transmission of vibrations and can significantly reduce the amount of low-frequency noise that escapes your studio.
Maintaining a noise-free drum studio
Soundproofing your drum studio is an ongoing process that requires regular maintenance and attention to ensure that it remains effective over time. As materials age and the environment around your studio changes, it's important to be vigilant and address any issues that may arise.
Regularly inspect your soundproofing materials and check for any signs of wear, damage, or deterioration. This may include cracks in the drywall, gaps in the weatherstripping, or loosening of the acoustic panels. Promptly address any issues to prevent sound leaks and maintain the integrity of your soundproofing system.
Additionally, consider implementing a regular cleaning and maintenance routine for your drum studio. Dust, debris, and other contaminants can accumulate over time and compromise the performance of your soundproofing materials. By keeping your studio clean and well-maintained, you can ensure that your soundproofing solutions continue to provide the desired level of noise control.
Conclusion: Enjoying the benefits of a soundproof drum studio
By following the comprehensive strategies outlined in this guide, you can successfully create a soundproof drum studio that allows you to enjoy your drumming passion without disrupting your neighbors or family members. From assessing your space for sound leaks to implementing the right soundproofing materials and techniques, you now have the knowledge and tools to transform your drum studio into a peaceful, noise-free haven.
The benefits of a soundproof drum studio are numerous. Not only will you be able to practice and perform without worrying about the impact on those around you, but you'll also experience improved acoustics and a more focused, distraction-free environment for your drumming. This can lead to enhanced creativity, better technique development, and a more rewarding overall drumming experience.
As you embark on your soundproofing journey, remember to be patient, thorough, and willing to experiment with different solutions. Every drum studio is unique, and the perfect soundproofing approach may require some trial and error. But with persistence and the right guidance, you can achieve the ultimate goal of a truly noise-free drum studio that allows you to fully immerse yourself in the rhythmic magic of drumming.
