Drum Maintenance and Care: Keeping Your Kit in Top Shape
Taking care of your drum set is crucial for maintaining its sound quality and longevity. As a drummer, I understand the importance of proper drum maintenance and care. In this section, I will share some essential tips and techniques to help you keep your kit in top shape.
Cleaning and polishing your drums and hardware, proper drum tuning, and storage are all key aspects of drum maintenance. By following these tips, you can ensure that your drum set stays in optimal condition for a long time to come.

Key Takeaways:
- Regularly clean and polish your drum hardware to keep it looking great.
- Properly tune your drums using the right tension and equal tension on all tension rods.
- Take care of drum hoops by regularly wiping them down and using a hoop protector for the bass drum hoop.
- Wipe down drum shells regularly and store them in a temperature and humidity controlled environment.
- Clean and polish your cymbals using specialized cleaners or natural solutions like lemon juice or vinegar.
Cleaning and Polishing the Hardware
Regularly cleaning and polishing your drum hardware is an essential part of drum maintenance. By keeping your hardware clean and well-maintained, you can ensure its longevity and optimal performance. Here are some tips for cleaning and polishing your drum hardware:
- Clean and polish the hardware: Use a soft, lint-free cloth to wipe down the hardware after each use. Remove any dust, dirt, or fingerprints from the surfaces. For stubborn stains or tarnishes, use a mild metal polish specifically designed for drum hardware. Apply a small amount of polish to the cloth and gently rub the hardware in circular motions. Wipe off any excess polish with a clean cloth.
- Lubricate stands and pedals: Regularly lubricate the moving parts of your stands and pedals to ensure smooth operation. Use a silicone-based lubricant or a specialized drum pedal oil. Apply a small amount of lubricant to the moving parts and work it in to ensure even distribution. This will help prevent rust, corrosion, and friction that can affect the performance of your hardware.
- Wipe down and polish: After cleaning and lubricating the hardware, give it a final wipe down and polish to restore its shine. Use a clean cloth to remove any remaining residue or fingerprints. For a polished finish, you can use a dedicated metal polish or a gentle brass or silver cleaner. Apply the polish to the cloth and gently rub the hardware in small circular motions. Buff the hardware with a clean cloth to bring out its natural luster.
Remember to also take proper care of your hardware during storage and transport. Use cases or bags specifically designed for drum hardware to protect it from scratches, dents, and other damage. Proper cleaning and maintenance of your drum hardware will not only keep it looking great but also ensure its optimal performance for years to come.
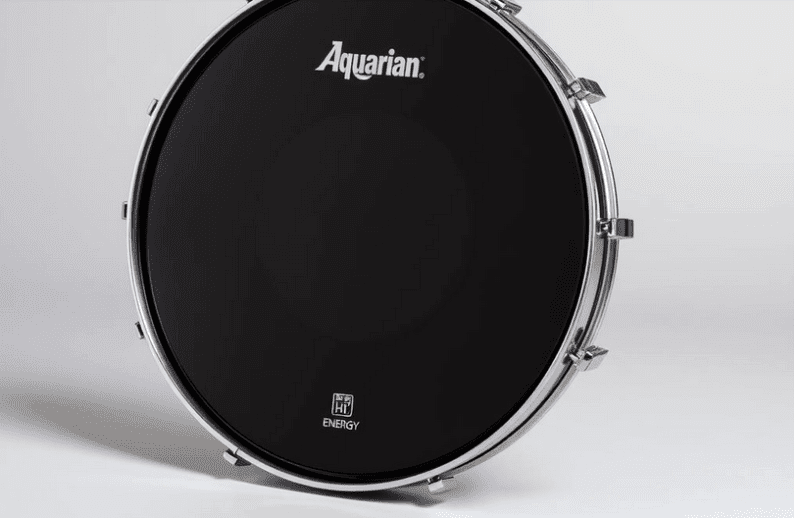
Maintaining Drum Hoops
Proper drum hoop maintenance is crucial for achieving optimal drum tuning and prolonging the lifespan of your drum set. In this section, I will share some essential drum hoop maintenance tips to help you keep your drums sounding their best.
Tuning Your Drums
When it comes to drum tuning, the tension of the drumheads plays a significant role in achieving the desired sound. To ensure even tension across the drum, it's vital to tune each tension rod in a star pattern. Start with moderate tension on each rod and gradually adjust them while tapping the drum to listen for pitch discrepancies. This will help you achieve a well-tuned drum with a balanced tone.
Additionally, it's important to regularly check the tension of your drumheads and make any necessary adjustments. Drums can lose tension over time, especially with extended playing sessions or changes in temperature and humidity. By regularly tuning your drums, you can maintain consistent sound quality and prevent any potential issues.
Protecting Drum Hoops
To keep your drum hoops in top condition, it's crucial to protect them from rust and damage. Regularly wiping down the hoops with a clean cloth after each playing session is a simple yet effective way to prevent rust build-up. Additionally, using a hoop protector for your bass drum hoop can help protect it from potential damage caused by the bass drum clamp.
Proper drum hoop maintenance is an essential part of taking care of your drum set. By following these drum hoop maintenance tips, you can ensure that your drums stay in tune and perform at their best for years to come.
Caring for Drum Shells
When it comes to maintaining your drum set, caring for the drum shells is of utmost importance. The drum shells are the heart and soul of your kit, responsible for the overall resonance and tuning. Proper care and maintenance will ensure that your drums sound amazing and last for years to come.
To begin with, it is essential to regularly wipe down the drum shells using a soft microfiber cloth. This will help remove any dust, grime, or fingerprints that can accumulate over time. For drum shells with glossy finishes, using a specialized drum polish can enhance the visual appeal.
When replacing drum heads, it is crucial to clean the bearing edges and the inside of the shell. This ensures optimum contact between the drum head and the drum shell, resulting in better resonance and tone. Use a mild soap solution or specialized drumhead cleaner to gently clean the bearing edges, removing any dirt or residue.
Lastly, proper storage is essential to prevent the warping or cracking of the drum shells. Store your drums in a temperature and humidity-controlled environment to minimize any damage caused by extreme conditions. Investing in drum cases or bags will provide additional protection during transportation and storage.
Table: Drum Shell Maintenance Checklist
| Step | Description |
|---|---|
| 1 | Regularly wipe down the drum shells with a soft microfiber cloth. |
| 2 | Use specialized drum polish for glossy finishes. |
| 3 | Clean the bearing edges and inside of the shell when replacing drum heads. |
| 4 | Store drums in a temperature and humidity-controlled environment. |
By following these drum shell maintenance tips, you can ensure that your drum set remains in optimal condition, delivering excellent sound quality and performance. Take the time to care for your drum shells, as they are the foundation of your drumming experience.
Cleaning and Polishing Your Cymbals
I see the cymbals as the shining stars of any drum set. They not only add dynamic accents to the music but also enhance the visual appeal of the kit. To keep your cymbals looking and sounding their best, regular cleaning and polishing are essential. In this section, I will share some effective drum-cleaning techniques specifically for cymbals.
To start, it's important to note that cymbals are delicate and can be easily damaged if not cleaned properly. Therefore, it's crucial to avoid using harsh household solvents or abrasive cleaners that can cause discoloration or scratches. Instead, opt for specialized cymbal cleaners or natural solutions like lemon juice or vinegar. These gentle substances can effectively remove dirt, fingerprints, and tarnish without harming the cymbals.
When cleaning your cymbals, take the time to inspect them for any cracks or damages. If you notice any issues, it's best to consult a professional for repair or replacement. Additionally, make sure to handle the cymbals with care and avoid dropping them or stacking them on top of each other to prevent accidental dents or cracks.
Once you have chosen a suitable cleaning solution, apply it to a soft cloth or sponge and gently wipe the cymbals in a circular motion, following the grooves of the cymbal's surface. Avoid scrubbing too vigorously, as it can remove the cymbal's protective coating or alter its tonal characteristics. After cleaning, rinse the cymbals with warm water and thoroughly dry them with a clean, lint-free cloth.
To maintain the luster and shine of your cymbals, consider using a cymbal polish specifically designed for this purpose. Apply a small amount of the polish onto a cloth and buff the cymbals in a gentle, circular motion. This will help restore their brilliance and protect them from oxidation.
Remember, keeping your cymbals clean and well-maintained not only extends their lifespan but also ensures optimal sound quality. So, take the time to give them the care they deserve, and they will continue to be the shining stars of your drum set.
Maintaining Stands, Pedals, and Mounts
As a drummer, it's crucial to pay attention to the maintenance of your stands, pedals, and mounts. These components are not only vital for the stability and functionality of your drum set, but they also contribute to your overall playing experience. Here are some tips to keep your stands, pedals, and mounts in top shape:
Inspection and Cleaning
Regularly inspect your stands, pedals, and mounts for any signs of wear and tear. Check for loose screws, damaged joints, or any other issues that may affect their stability or performance. If you notice any problems, address them promptly to avoid further damage. Additionally, it's important to regularly clean your stands, pedals, and mounts to remove dirt, dust, and other debris. Use a soft cloth or brush to wipe away any residue and ensure smooth operation.
Lubrication
To maintain the smooth movement and quick action of your pedals and stands, it's essential to lubricate the bearings regularly. Apply a small amount of lubricant to the moving parts of your pedals and stands, following the manufacturer's instructions. This will help reduce friction and ensure optimal performance. However, be cautious not to over-lubricate, as excessive lubrication can attract dirt and cause unwanted buildup.
Moisture and Humidity Control
If your drum set is exposed to moisture or humidity, such as in outdoor performances or humid environments, it's crucial to take extra precautions. Moisture can cause rust and corrosion, damaging the metal components of your stands, pedals, and mounts. To prevent this, wipe down your equipment after each use and consider using protective covers or cases when transporting them. Additionally, storing your drum set in a dry and well-ventilated area can help minimize the risk of moisture-related damage.
| Component | Maintenance Tips |
|---|---|
| Stands | - Inspect for loose screws or damaged joints regularly - Clean with a soft cloth or brush to remove dirt and debris - Lubricate the bearings to ensure smooth movement |
| Pedals | - Check for loose screws and damaged parts - Clean with a soft cloth or brush to remove dirt and residue - Apply lubricant to the bearings for smooth operation |
| Mounts | - Inspect for any signs of wear and tear - Clean with a soft cloth or brush to remove dirt and dust - Ensure proper installation and secure mounting |
By following these maintenance tips, you can prolong the lifespan of your stands, pedals, and mounts, ensuring they remain in optimal condition for your drumming needs. Taking the time to care for these components will not only improve the overall performance of your drum set but also enhance your playing experience.

Section 7: Repairing Cracked Cymbals
When it comes to maintaining your drum kit, it's essential to address any cracks in your cymbals as soon as possible. Cracked cymbals can negatively impact their sound quality and longevity. In this section, I will provide you with insights and techniques on how to repair cracked cymbals effectively.
Methods to Repair Cracked Cymbals:
| Method | Description |
|---|---|
| Filing | This method involves filing away the cracked part of the cymbal. It is important to be cautious and follow tutorials to ensure safe and effective repairs. |
| Drilling | Another method is to carefully drill above the crack. This technique requires precision and care to prevent further damage to the cymbal. |
Both methods can be effective in repairing cracked cymbals, but it's crucial to approach the repair process with caution. If you're unsure about performing the repair yourself, it's advisable to seek professional assistance to ensure the best possible outcome.
"Repairing cracked cymbals is a delicate process that requires patience and precision. It's important to catch cracks early and address them promptly to prevent further damage to your cymbals. Whether you choose to file or drill, remember to exercise caution and refer to reliable tutorials or seek professional help if needed." - Professional Drum Technician
Cleaning Drum Kit: Step-by-Step Guide
Keeping your drum kit clean is an essential part of its maintenance routine. Regular cleaning helps to preserve the appearance and quality of your drums, ensuring they continue to sound their best. Follow this step-by-step guide to effectively clean your drum kit:
Gather Your Cleaning Supplies
- Microfiber cloths
- Drum polish
- Vinegar or mild dish soap
- Cymbal cleaner
- Drumhead cleaner
- Lubricant for tension rods and pedal bearings
Note: Before using any cleaning products, check the manufacturer's recommendations to ensure they are safe for your specific drum kit.
Cleaning the Drum Shells
- Start by wiping down the drums with a microfiber cloth after each playing session to remove fingerprints and dust.
- For a thorough cleaning, disassemble the drums and remove the drumheads.
- Using a drum polish or a mixture of vinegar and water (1:1 ratio), lightly dampen a microfiber cloth and gently wipe down the drum shells. Avoid excessive moisture.
- Clean the bearing edges of the drum shells using a drumhead cleaner or a mild dish soap solution.
- Wipe down the tension rods with a cloth and apply a small amount of lubricant to ensure they move smoothly.
Cleaning the Cymbals
- Remove the cymbals from the drum set and place them on a flat surface.
- Apply a specialized cymbal cleaner or a mixture of water and mild dish soap to a soft cloth.
- Gently wipe the cymbals in a circular motion, following the grooves, to remove dirt and grime.
- Rinse the cymbals with warm water and pat them dry using a clean cloth.
- Apply a cymbal polish if desired to restore their shine.
Regularly cleaning and maintaining your drum kit is not only essential for its longevity but also for your own enjoyment as a drummer. By following this step-by-step cleaning guide, you can keep your drum kit looking and sounding its best for years to come.
Drum Kit Maintenance Tips
Proper drum care is essential for keeping your drum kit in optimal condition and ensuring its longevity. By following these maintenance tips, you can prolong the lifespan of your drums and maintain their sound quality.
Cleaning and Caring for Wrapped Drums
If your drums have wrapped finishes, it's important to handle them with care to avoid scratching the surface. Use a soft cloth or microfiber cloth to wipe down the drums after each playing session. Avoid using abrasive cleaners or solvents that can damage the wrap. For a thorough cleaning, you can use a mixture of warm water and mild dish soap. Gently scrub the drum shells with a soft cloth, then rinse and dry them thoroughly. This will help remove dirt, sweat, and other residues that can accumulate on the drum's surface.
Refreshing Drum Heads
Drum heads play a crucial role in producing the desired sound. Over time, drum heads can become worn out or lose their responsiveness. It's important to regularly refresh your drum heads to maintain optimal performance. Consider replacing your drum heads every few months, depending on your playing frequency. When changing drum heads, remember to clean the bearing edges and the inside of the shell. This will ensure a clean and smooth contact surface for the new drum head, allowing for better tuning and resonance.
Maintaining Stands, Pedals, and Hardware
Stands, pedals, and hardware are vital components of your drum kit and require regular maintenance. Keep the screws and hinges tightened to prevent any loose parts. Lubricate the bearings on your pedals to ensure smooth movement and optimal performance. Regularly inspect your drum hardware for any signs of wear or damage. If necessary, replace worn-out parts to avoid further issues. Proper maintenance of stands, pedals, and hardware will contribute to the overall stability and functionality of your drum kit.
| Drum Maintenance Tips | Benefits |
|---|---|
| Regularly clean and polish your drums | Preserves the appearance and extends the lifespan of the drum shells |
| Tune your drums properly | Ensures a consistent and balanced sound across all drums |
| Store your drums in a controlled environment | Prevents warping, cracking, and damage caused by extreme temperature and humidity |
| Clean and polish your cymbals | Preserves the sound quality and extends the longevity of the cymbals |
| Regularly inspect and maintain stands, pedals, and hardware | Ensures optimal performance and minimizes the risk of equipment failure |
By following these drum maintenance tips, you can keep your drum kit in excellent condition and maximize its lifespan. Remember to clean and care for your drums regularly, refresh your drum heads when needed, and maintain your stands, pedals, and hardware. With proper maintenance, your drum kit will continue to serve you well for years to come.
Conclusion
As a drummer, taking care of your drum kit is essential to ensure its longevity and maintain its sound quality. By following proper drum maintenance and care routines, you can keep your kit in top shape and continue to enjoy amazing performances.
Regular cleaning and polishing of your drum hardware, including stands and pedals, not only keeps them looking great but also enhances their performance. Wiping down the drum hoops and tuning your drums properly will help maintain their tone and ensure equal tension across all tension rods. Caring for your drum shells, including regular cleaning and storage in a controlled environment, prevents warps and cracks.
In addition, cleaning and polishing your cymbals using specialized cleaners or natural solutions will prolong their lifespan and preserve their sound quality. It's also crucial to regularly maintain your stands, pedals, and mounts by wiping them down and lubricating the bearings. Checking for any issues and tightening screws and hinges will ensure smooth movement and reliable performance.
Finally, in order to repair any cracked cymbals, it's important to catch the cracks early and follow safe repair methods. Regularly cleaning your drum kit, from wiping down the drums after each use to disassembling and thoroughly cleaning the shells, is crucial for its overall maintenance.
Remember, drum kit care and maintenance are ongoing processes that require dedication and attention to detail. By implementing these drum set maintenance tips and routines, you can extend the life of your drums and continue to create amazing music for years to come.
FAQ
Why is regular cleaning and polishing of drum hardware important?
Regular cleaning and polishing of drum hardware helps maintain its overall appearance and functionality, preventing rust and other damage.
How should I clean and polish my drum hardware?
Polish the hardware, lubricate stands and pedals, and wipe down and polish them using appropriate cleaning products. Use cases and bags for safe storage and transportation.
How can I properly tune my drums?
Proper drum tuning involves applying the right tension and equal tension on all tension rods. This helps maintain the drums' sound quality and prevents them from going out of tune.
What should I do to maintain drum hoops?
Wipe down the hoops regularly to prevent rust and use a hoop protector for the bass drum hoop to avoid damage from the bass drum clamp.
How should I care for drum shells?
Wipe down the drum shells regularly with microfiber cloths and use drum polish for glossy finishes. When replacing drum heads, clean the bearing edges and the inside of the shell. Store your drums in a temperature and humidity-controlled environment to prevent warps or cracks.
How can I keep my cymbals clean and polished?
It's important to avoid using household solvents or abrasive cleaners that can damage the cymbals. Instead, opt for specialized cymbal cleaners or natural solutions like lemon juice or vinegar. Gently clean and polish the cymbals following their grooves.
How should I maintain stands, pedals, and mounts?
Regularly wipe them down and inspect them for any issues. Lubricate the bearings on pedals and ensure smooth movement and quick action. Check your cymbal stands, especially if your kit is exposed to moisture or humidity.
What should I do if my cymbals have cracks?
Cracked cymbals can impact their sound quality and longevity. You can file away the cracked part of the cymbal or carefully drill above the crack to repair it. Follow tutorials and be cautious when attempting repairs.
How should I clean my drum kit?
Start by wiping down the drums after each playing session with a microfiber cloth. For a thorough cleaning, disassemble the drums and clean the shells using drum polish or household items like vinegar or dish soap. Lubricate the bearing edges and clean the tension rods.
What additional tips are there for drum kit maintenance?
Avoid scratching the surface when cleaning wrapped drums, regularly refresh drum heads, keep screws and hinges tightened, and check the beater and drive components of your pedals. Regularly inspect and maintain your drum kit for optimal performance.
Why is proper drum maintenance important?
Proper drum maintenance helps keep your kit in top shape, preserves its sound quality, and ensures its longevity. By following maintenance tips and routines, you can enjoy optimal performance from your drum kit.
Source Links