Tuning your drums is an art that transforms good drummers into great ones. Achieving the best drum sound isn't just about banging away; it's a careful process of adjusting drum tension, selecting the right drumheads, and mastering drum tuning techniques.
Knowing how to tune your drums for the best sound ensures each beat resonates perfectly with clarity and depth. This skill can set you apart in the world of percussion tuning, where precision meets creativity.
With years of experience fine-tuning my own kit and helping others perfect their tone, I've learned that one key factor is experimenting with different tensions between the top head (batter) and bottom head (resonant) to achieve various sounds.
Whether you're aiming for a punchy beat or a rich resonance, understanding how to adjust lug placement, use drum gels efficiently, and select suitable drumheads makes all the difference.
Ready to enhance your drumming?
Key Takeaways
- Use a drum key and gels to adjust tension rods for the right pitch and control overtones. This ensures your drums sound their best.
- Learn about your drum parts, like the batter and resonant heads, to tune correctly. Knowing these will help you create clearer sounds.
- Follow a step-by-step guide: tighten tension rods in a diagonal pattern, stretch out wrinkles, start with the bottom head then the top, and fine-tune each until you get your desired pitch.
- Experiment with different drumhead types and tensions to find what works best for you. Adding drum gels can also refine your sound by adjusting resonance.
- Avoid common mistakes such as not using enough tension or overtightening tension rods, which can lead to poor sound quality or damage to your drums.
How to Prepare for Drum Tuning
Prepare for drum tuning by gathering necessary tools, such as the drum key and gels. Also, take the time to familiarize yourself with the different parts of your drums.
Gather Necessary Tools (drum key, gels)
To start tuning your drums for the best sound, you need a drum key and some gels. A drum key is essential for adjusting tension rods to get the right pitch and tone from your drum heads.
Drum keys are easy to use but make a huge difference in sound quality. Gels help control overtones and focus your drum's sound. Placing them correctly can enhance resonance and clarity, transforming how your kit performs.
From my experience, having these tools ready before you begin makes the process smoother. I learned the hard way that tuning without a drum key takes longer and never quite gets the sound right.
Using gels was a game-changer for me, especially after experimenting with their placement on each head. It allowed me to achieve that perfect balance between punchy lows and bright highs, essential for every drummer aiming to refine their kit’s sound profile.
Familiarize Yourself with Drum Parts
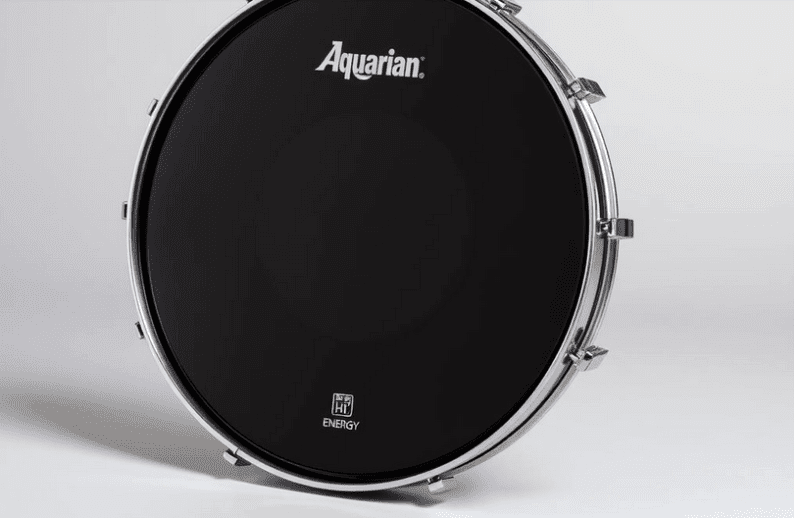
When tuning your drums, it's essential to understand the different parts. Each drum has two heads: the batter head (top) and resonant head (bottom). The tension rods hold both heads in place, maintaining the desired pitch.
Knowing these parts will help you effectively tune for the best sound.
Get acquainted with the counter hoop, which secures both heads in place via the tension rods. This understanding is crucial for proper drumhead tuning and achieving optimal resonance and tone.
Familiarizing yourself with these parts is fundamental to mastering your drum tuning skills.
Mastering drum tuning requires a clear understanding of each part of your drum kit.
Step-by-Step Guide to Tuning Your Drums
Tuning your drums involves identifying the need for change, tightening tension rods in a diagonal pattern, stretching and removing wrinkles from the drum head, tuning bottom and top heads, then fine-tuning to achieve the desired pitch.
It's an essential skill that can improve your overall sound quality.
Determine if you need to change the drum head or retune
To determine if you need to change the drum head or retune, start by checking for any visible signs of wear and tear on the drumhead. If you notice any dents, tears, or significant stretching, it may be time to replace the drum head.
Additionally, if your drums sound dull or lack resonance despite tuning efforts, this could indicate the need for a new drum head. Ensuring that your drum heads are in good condition is essential for achieving the best sound from your drums.
Moving on to preparing for drum tuning:
- Gather necessary tools (drum key, gels)
- Familiarize yourself with drum parts
Center the drum head and tighten the tension rods in a diagonal pattern
When tuning your drums, start by centering the drum head and then tighten the tension rods in a diagonal pattern.
- Begin by placing the drum on a flat surface and locating the center of the drumhead.
- Use the drum key to tighten the tension rods in a diagonal pattern, ensuring an even tension across the head.
- Continue to adjust each rod gradually, working around the head, until it feels evenly tensioned.
- Check for wrinkles and ensure they are smoothed out as you go along.
- Once completed, tap lightly around the edge of the drum to make sure all areas produce a similar pitch.
By following these steps, you can effectively center your drum head and achieve proper tension using the diagonal tightening method.
Stretch and Remove Wrinkles from the Head
To stretch and remove wrinkles from the drum head, press down on the center to eliminate any slack. Then work your way around the edge, ensuring even tension. Tighten each lug bit by bit using a drum key in a diagonal pattern to avoid uneven tension.
This helps to remove any remaining wrinkles for a smooth surface.
Now you're ready to fine-tune! Start by tuning the bottom (resonant) head first, then move on to the top (batter) head. Experiment with different tension levels and listen carefully until you achieve your desired pitch.
Remember that the right tension ensures optimal resonance and tone for your drums.
Ready? Let's delve into tips for achieving the best drum sound!
Tune the bottom (resonant) head first, then the top (batter) head
When it comes to achieving the best drum sound, tuning the bottom (resonant) head first, followed by the top (batter) head is crucial. Here's a step-by-step guide for beginner drummers:
- Start by placing the resonant head on the bottom of the drum and secure it evenly.
- Use a drum key to tighten the tension rods in a diagonal pattern to ensure balanced tuning.
- Next, place and tune the batter head on top of the drum.
- Utilize the drum key again to achieve an even tension across all points of the head.
- Fine-tune both heads carefully to attain the desired pitch and resonance, ensuring a consistent tone.
These steps will help you optimize your drum's tone and resonance for an enhanced playing experience.
Fine-tune to the desired pitch
Once you've tuned both of your drum heads, it's time to fine-tune them to get the pitch just right. Use your drum key to make small adjustments to each tension rod until you reach the desired sound.
Take your time and go around the drum evenly, making sure all rods are adjusted equally. Keep experimenting with different tensions until you find the perfect pitch that suits your style of playing and enhances the overall resonance of your drums.
Remember that fine-tuning is essential in achieving the best sound from your drums. Experiment with different pitches, and don't be afraid to make subtle adjustments until you achieve the perfect tone that complements your playing style and overall rhythm.
This intentional process ensures that each drum head is precisely tuned to produce maximum resonance while giving you control over the clarity and pitch of each strike on your kit.
Tips for Achieving the Best Drum Sound
Experiment with different drumhead selections and tensions to find the perfect match for your desired sound. Consider using drum gels to further fine-tune the resonance of your drums.
Experiment with Different Drumhead Selections and Tension
To achieve the best sound, experiment with different drumhead types and tension settings. Different drumheads can significantly alter the tone of your drums, so consider experimenting with options such as coated, clear, single-ply, or double-ply heads to find what works best for you.
Adjusting the tension across each drumhead is crucial in enhancing resonance and clarity. Fine-tuning the tension can help you optimize the pitch and overall sound of your drums.
Finding the right combination of drumhead selection and tension is key to perfecting your drum tone. For instance, a tighter top head paired with a slightly looser bottom head can produce a punchier sound.
Similarly, experimenting with different tensions on both heads can provide depth and resonance while enhancing clarity. Taking some time to experiment with various combinations will help you unlock the secrets to achieving your desired drum sound.
Consider using drum gels.
Drum gels can enhance your drum sound by controlling overtones and adjusting the resonance. Experimenting with different placements of drum gels can significantly impact the tone and clarity of your drums, enabling you to achieve the optimal sound.
By strategically placing the gels about an inch inward from the counter hoop, you can effectively tailor your drum's resonance and achieve a more refined pitch. Don't hesitate to explore these simple yet powerful accessories to optimize your drum's performance.
Adjust Lug Placement
When adjusting lug placement, ensure it is evenly distributed to maintain consistent drum head tension. This step is crucial in optimizing the resonance and pitch of your drums. Experimenting with different lug placements allows you to fine-tune and enhance the overall sound quality.
Find the optimal lug placement for your desired drum tone by experimenting and listening attentively as you make adjustments.
Next, let's examine the impact of various drumhead selections on achieving the ideal sound.
Common Drum Tuning Mistakes to Avoid
Avoid insufficient tension on the drum head, and refrain from overtightening the tension rods.
Not Using Enough Tension
When tuning your drums, ensure that you apply enough tension to the drumheads for optimal sound quality. Inadequate tension can result in a flat and dull tone. Proper tension across the drumhead is essential for achieving clear and resonant sounds from your drums.
Experimenting with different levels of tension will help you find the perfect balance, enhancing the overall tone of your drums.
It's crucial to note that not using enough tension on your drumheads may lead to a lack of clarity and resonance in the sound produced by your drums. To avoid this, it's important to carefully adjust the tension rods to achieve the desired pitch and tone for each drumhead.
By applying sufficient tension, you can effectively enhance the clarity and pitch of your drums, resulting in a more dynamic and consistent sound during play.
Over-tightening Tension Rods
When tuning your drums, avoid over-tightening the tension rods. Excessive tightening can lead to warping or damaging the drum head and affecting its overall sound quality. It's essential to find the right balance in tension to ensure optimal resonance and tone without straining the drum heads.
Ensure that you strike a balance between tightening each tension rod uniformly to maintain even tension across the entire drum head surface. Over-tightening particular rods can cause uneven pressure, affecting the drum's pitch and tonal quality.
Keeping a consistent tension across all tension rods will help achieve a balanced and well-rounded sound for your drums.
Neglecting to fine-tune
Neglecting to fine-tune your drum heads can result in an unbalanced and inconsistent sound. This means that some parts of the drums may produce a different pitch than others, which can affect the overall quality of your performance.
Avoid neglecting this crucial step as it plays a key role in achieving the desired resonance and clarity from your drums. Fine-tuning ensures that each lug is adjusted to the appropriate tension, contributing to an even and harmonious tone across all drum surfaces.
The process of fine-tuning involves making subtle adjustments to the tension rods after the drum heads have been initially tuned. Neglecting this step can lead to discrepancies in pitch and tone, which detract from the optimal sound you seek to achieve.
By diligently fine-tuning each lug, you can ensure that your drums produce a consistent and balanced sound with enhanced resonance and clarity – essential elements for any drummer aspiring to improve their skill set.
Placing The Gels in The Wrong Spot
Placing the gels in the wrong spot can muffle or deaden your drum sound. Experiment with gel placement to find the optimal position for achieving the best resonance and tone. Start by placing gels about an inch inward from the drum's counter hoop, then adjust as needed to achieve your desired sound.
Remember that small adjustments can make a big difference in how your drums sound. Incorrect gel placement can affect the overall clarity and impact of your drumming performance, so be sure to experiment with different positions to enhance your drum tone.
Finding the right spot for gels is crucial in optimizing drum resonance and achieving clear, punchy sounds. Placing gels too close to the edge or in random spots may result in unwanted muffling or uneven tones.
Therefore, take time to try out various placements until you find what works best for your specific setup and playing style. Continue experimenting with gel placement during practice sessions and performances to refine and enhance your drumming experience.
First-hand experience: When I first started using gels, I placed them randomly on my drums without considering their impact on sound quality. However, after experimenting with various positions following expert advice, I found that placing them about an inch inward from the counter hoop provided improved resonance and tonal clarity for my drums.
Conclusion
Tuning your drums can transform their sound from good to great. Starting with the right tools and understanding each drum part sets you up for success. Tuning both the resonant and batter heads properly, considering pitch and tension, will enhance your drum's resonance and clarity.
Avoid common mistakes, such as over-tightening or uneven tuning, to achieve the best outcome. With these steps, achieving an excellent drum sound is within reach.
FAQs
1. How do I start tuning my drums for the best sound?
To start tuning your drums, you need to adjust the tension of the drumhead. This involves tightening or loosening the screws around the drum head until you get a clear tone.
2. What is the key to perfecting my drum tone?
Perfecting your drum tone involves fine-tuning drum heads and adjusting their tension. This helps enhance drum resonance and achieve the perfect pitch.
3. Can I improve the sound of my drums myself?
Yes, you can improve the clarity and overall sound of your drums by learning proper drumming techniques for tuning, including how to adjust pitch and optimize head tension.
4. Why is it important to tune my drums correctly?
Tuning your drums correctly is crucial because it affects their resonance, clarity, and pitch, ensuring you get the best possible sound while playing.
DISCLAIMER
This document is provided for general information purposes only and should not be relied upon as providing legal advice, technical, or specific operational guidance to the reader, whether as to the practices described in the document or the applicable legal requirements and regulations. Percussion Pros. Com expressly disclaims any responsibility for liability arising from or related to the use or misuse of any information in this document.

