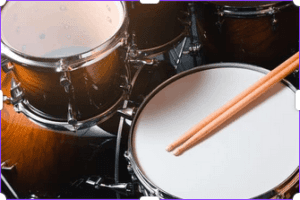
Recording a drum kit is a complex task. It needs a deep understanding of drum microphones and drum recording techniques. Whether live or in a studio, high-quality sound is key for a great musical experience.
The drum kit consists of various parts, including the bass drum, snare, toms, and cymbals. Each part presents unique challenges for miking. Choosing the right microphones and placing them correctly is crucial for capturing the full range and dynamics of the drums.
Utilizing effective drum recording techniques can significantly enhance sound quality. Understanding the strengths and limitations of various drum microphones enables you to optimize your setup for optimal results.

Key Takeaways
- Understanding the components of a drum kit is crucial for effective microphone placement.
- Proper microphone selection is critical for capturing high-quality sound.
- Different drum recording techniques can significantly impact the overall sound.
- Live and studio settings require different approaches to miking drum kits.
- Experimenting with microphone placement can lead to better sound quality.
Understanding the Drum Kit Components
Knowing the parts of a drum kit is crucial for achieving a great sound in both live and studio settings. The kit comprises many components, each with its unique characteristics.
Standard Drum Kit Pieces
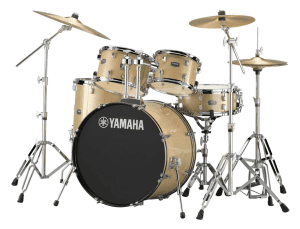
A typical drum kit has several main parts: the kick drum, snare drum, toms, cymbals, and hardware. Together, they create the kit's sound.
Shells: Kick, Snare, Toms
The drum shells, like the kick, snare, and toms, are the heart of the kit. The kick drum gives the low-end, the snare drum adds sharpness, and the toms add depth.
Cymbals and Hardware
Cymbals bring a bright, crashing sound. The hardware (stands, pedals, etc.) supports the drums and cymbals, making them easy to play.
Acoustic Properties of Different Drums
Each drum and cymbal has its own unique sound properties, including frequency ranges, attack, and decay. Knowing these is key for good miking.
Frequency Ranges
Different drums sound in different frequency ranges. For instance, the kick drum has low-end sounds, while the snare drum has midrange and high sounds.
Attack and Decay Characteristics
The attack is the drum hit's initial sound, and the decay is how it fades. Knowing these helps pick the right miking methods.
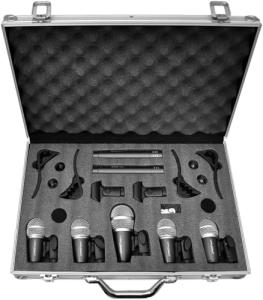
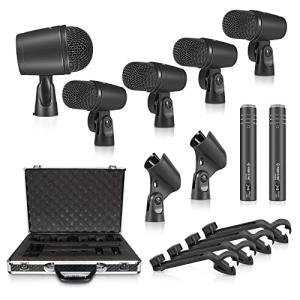
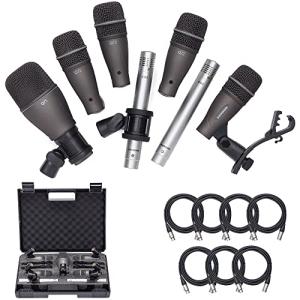
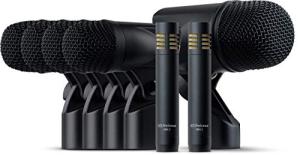
Essential Microphone Types for Drum Recording

To get great drum recordings, knowing your microphone options is key. The right mic can make a huge difference in sound quality. It's important to understand what each type does best.
Dynamic Microphones
Dynamic microphones are tough and can handle loud sounds. They're perfect for getting close to individual drums.
Popular Models for Drums
The Shure SM57 and Sennheiser MD421 are top picks for drumming. They're known for their durability and clear sound.
Best Applications
Use dynamic mics for the snare, toms, and sometimes the kick. They're great at isolating sounds and handling loud volumes.
Condenser Microphones
Condenser mics pick up a wider range of sounds and are more sensitive. They're great for capturing cymbals and the overall kit ambiance.
Large vs. Small Diaphragm
Large diaphragm condensers are good for overheads and room miking. They capture a broad range of sounds. Small diaphragm condensers are better for hi-hats and overheads, offering accuracy.
Overheads and Room Mic Options
Condenser mics are versatile. They can be used for overheads to capture the whole kit or as room mics for ambiance.
Specialty Microphones
Specialty mics meet specific needs. They include boundary mics, clip-on mics, and subkick mics. These offer unique solutions for tricky recording situations.
Boundary Mics and Clip-ons
Boundary microphones are ideal for specific areas, such as the floor tom or kick drum. They're placed on a surface. Clip-on microphones attach to drums or cymbals for a focused sound.
Subkick and Other Unique Options
The subkick microphone captures the kick drum's low-end, adding depth. Other unique options like ribbon mics and contact mics can also add something special to drum recordings.
Basic Principles of How to Mic a Drum Kit for Live and Studio Settings

To get great sound from a drum kit, you need to know the basics of miking. This includes close and ambient miking. These principles are key for both live shows and studio recordings.
Close Miking vs. Ambient Miking
Close miking involves placing microphones close to the drums to achieve a clear sound. It's great for loud environments or when you want to reduce the sound from other instruments. Ambient miking, on the other hand, utilizes microphones positioned farther away to capture the room's natural reverb. This adds depth and character to the sound.
When to Use Each Approach
Close miking is ideal for genres like rock or metal, where a tight sound is desired. Ambient miking is better for jazz or classical, where a roomy sound is preferred.
Combining Both Techniques
Using both close and ambient miking often gives the best results. This mix strikes a balance between the drums' intimacy and the room's ambiance.
Phase Considerations
Phase issues can happen when using multiple microphones. This can make the sound uneven or "phasey." It's important to check for phase coherence when mixing signals from different mics.
Checking for Phase Issues
To find phase issues, listen to the mix and then flip the phase of one mic. If the sound gets better, the original phase was wrong.
Using the 3:1 Rule
The 3:1 rule helps with microphone placement to avoid phase problems. It says the distance between two mics should be at least three times the distance from the mic to the sound source.
Stereo Imaging Techniques
Stereo imaging is key for a wide and immersive soundstage. There are many ways to achieve this.
X/Y, ORTF, and Spaced Pair Methods
Methods like X/Y, ORTF, and spaced pair miking create a wide stereo image. X/Y miking uses two mics angled towards each other. ORTF has a slightly wider angle. Spaced pair miking places two mics apart for a broad soundstage.
Creating Width in the Mix
To add width to the mix, use panning. This moves different parts of the drum kit across the stereo field. It makes the sound more spatial.
| Miking Technique | Description | Application |
|---|---|---|
| Close Miking | Microphones placed near the drums | Rock, Metal, Loud Environments |
| Ambient Miking | Microphones placed further away | Jazz, Classical, Roomy Sound |
| X/Y Miking | Two microphones angled towards each other | Capturing a focused stereo image |
Miking Techniques for Live Performances
Miking drums for live shows is a complex task. It needs both technical skills and real-world experience. Getting the sound right is key to a great show. You must know the venue, the drums, and the gear to get the best sound.
Minimalist Approach for Small Venues
In small places, using fewer mics works well. This method captures the drums' sound while keeping other stage sounds out.
Essential Microphones for Limited Inputs
For small places with few mixing options, focus on a few important mics. A dynamic mic on the snare and a good overhead can do the trick.
Maximizing Coverage with Fewer Mics
To cover more with less, think about mic placement. For example, one mic can catch the snare and hi-hats. This way, you use less gear to get more sound.
Full Miking for Larger Venues
Bigger venues need more mics to reach everyone. This ensures the drum sound is clear across the room, even with lots of other sounds.
Standard Live Drum Mic Setup
In big venues, you'll need mics on the kick, snare, toms, hi-hats, and overheads. This setup gives a balanced sound that fits the venue's acoustics.
Monitor Mix Considerations
The drummer's monitor mix is very important. If they can't hear themselves, their performance will suffer.
Dealing with Stage Volume and Bleed
Stage volume and bleed are big challenges. Using gates and isolation can help manage these issues.
Using Gates and Isolation Techniques
Gates cut off the signal when it's too low, reducing bleed. Isolation shields around the drums also help.
Balancing with Other Instruments
Getting the drums to sound right with other instruments is crucial. Adjust levels, EQ, and use compression to make sure the drums fit well in the mix.
| Miking Technique | Application | Benefits |
|---|---|---|
| Minimalist Approach | Small Venues | Reduces bleed, simplifies mix |
| Full Miking | Large Venues | Provides detailed sound, can be mixed for venue |
| Gates and Isolation | All Venues | Controls bleed, improves sound clarity |
Studio Drum Recording Techniques
Recording drums in a studio is complex. It involves room acoustics and where to place microphones. Getting a great drum sound needs both technical skills and creativity.
Room Acoustics Considerations
Room acoustics are key in studio drum recording. The room's sound affects what the microphones pick up.
Room Mic Placement
Using a room mic adds depth and complexity. Where you place it greatly changes the sound's tone and ambiance.
Controlling Reflections
To get a clean sound, controlling room acoustics is crucial. Acoustic panels and diffusers help with this.
Multi-Microphone Setups
Using many microphones gives more options for capturing the drum sound. This lets engineers mix different sounds for the perfect tone.
Minimal vs. Maximal Approaches
Choosing between few or many microphones depends on the sound needed. A few microphones might be enough, while many can offer more detail.
Layering Different Microphone Types
Using different microphones, like dynamic and condenser, adds depth. This way, engineers can use each mic's strengths.
Recording for Different Music Genres
Each music genre has its own drum recording needs. Knowing these differences helps create authentic sounds.
Rock and Metal Drum Sounds
Rock and metal want a strong drum sound. Specific mic techniques and processing can achieve this.
Jazz and Acoustic Music Approaches
Jazz and acoustic music need a softer drum sound. A simple mic setup and focusing on room ambiance work well.
| Genre | Microphone Approach | Desired Sound |
|---|---|---|
| Rock/Metal | Multiple dynamic mics | Powerful, aggressive |
| Jazz/Acoustic | Minimalist setup, condenser mics | Nuanced, natural |
Microphone Placement Guide for Each Drum Component
Getting the perfect drum sound starts with knowing how to place microphones. Each part of the drum kit needs its own special spot. This ensures the best sound quality for recordings or live shows.
Kick Drum Miking
The kick drum is the heart of the kit. Choosing between inside vs. outside Placement is key.
Inside vs. Outside Placement
Putting a mic inside the kick drum captures its attack and low-end. Outside placement gives a more natural sound.
Double Miking Techniques
Using both inside and outside mics makes the sound fuller. It gives you more options when mixing.
Snare Drum Miking
The snare drum's sharp sound is essential. Top and Bottom Mic Placement is vital for its full sound.
Top and Bottom Mic Placement
Miking the top and bottom of the snare gives a rich sound. The top mic gets the attack, and the bottom gets the resonance.
Angle and Distance Considerations
The mic's angle and distance from the snare head matter a lot. Try different spots to find the right tone.
| Drum Component | Miking Technique | Sound Characteristic |
|---|---|---|
| Kick Drum | Inside Placement | Enhanced Low-End |
| Snare Drum | Top and Bottom | Rich, Detailed |
| Toms | Clip-on | Clear, Focused |
Tom Miking
Toms add depth to the kit. Clip-on vs. Stand-mounted Options have their benefits.
Clip-on vs. Stand-mounted Options
Clip-on mics give a clear sound. Stand-mounted mics offer more placement options.
Placement for Different Tom Sizes
The size of the tom affects mic placement. Larger toms need a different approach than smaller ones.
Hi-Hat and Cymbal Miking
Hi-hats and cymbals add rhythm. Dedicated Cymbal Mics enhance their sound.
Dedicated Cymbal Mics
Dedicated mics for cymbals capture their full range and clarity.
Avoiding Bleed and Harsh Frequencies
Place mics carefully to avoid bleed and harsh sounds.
Overhead Microphone Placement
Overhead mics capture the kit's overall sound. Height and Spacing Considerations are key.
Height and Spacing Considerations
The height and spacing of overhead mics greatly affect the sound. Experiment to find the best spot.
Capturing the Full Kit Image
Overhead mics create a balanced sound that shows the whole kit.
Conclusion
To get great sound from a drum kit, you need to know about the different parts, types of microphones, and how to use them. Drummers and audio engineers can improve their work for live shows and studio recordings by learning these basics.
Choosing the right microphone and where to place it is key to getting the sound you want. Whether it's a simple setup for small places or a detailed one for big venues, knowing how to mix close and ambient miking is important. Also, understanding phase is crucial.
In studios, the room's sound and using many microphones affect the final mix. By following the best ways to record drums, like correct mic placement and stereo imaging, engineers can make a sound that fits the music well.
Experimenting and practicing are the secrets to great drum miking. By knowing the basics and adjusting techniques for your needs, you can make a sound that makes the music better. This shows how important it is to follow the best practices for drum recording and to do a good job with drum miking.
FAQ
What are the best microphones for recording drums?
How do I mic a kick drum for a live performance?
What's the difference between close miking and ambient miking?
How do I reduce bleed between microphones when recording drums?
What are some tips for miking a snare drum?
How do I choose the right microphone for recording toms?
What is the best way to mic the overheads for a drum kit?
How do I adjust my drum miking technique for different music genres?
DISCLAIMER
This document is provided for general information purposes only and should not be relied upon as providing legal advice, technical, or specific operational guidance to the reader, whether as to the practices described in the document or the applicable legal requirements and regulations. Percussion Pros expressly disclaims any responsibility for liability arising from or related to the use or misuse of any information in this document.