Drumming is a passion for many, but it can disturb those around you. Whether you're recording at home or just want to be considerate, reducing drum noise is key. A drum isolation platform is a simple way to do this.
We'll show you how to make your own DIY drum isolation platform. You can use cheap materials and easy steps to get great sound. Our guide will help you understand why isolation matters, build your platform, and fix common problems.

Key Takeaways
- Understand the importance of drum isolation for home recording and noise reduction.
- Learn how to build a DIY drum isolation platform using affordable materials.
- Discover simple techniques to minimize sound transmission and vibration.
- Follow step-by-step instructions for constructing your drum isolation platform.
- Troubleshoot common issues that may arise during the DIY process.
Why Drummers Need Isolation Platforms
Drummers in home settings face big challenges because of the noise and vibrations drums make. Drums are very loud, causing sound and vibrations that can go through floors and walls.
This can upset neighbors and make recording hard for drummers. It's tough to practice or record without disturbing others.
Sound Problems in Home Studios
Home studios often have sound transmission issues because of drum vibrations. This leads to neighbor complaints and recording difficulties.
The table below shows common sound problems in home studios:
| Issue | Description | Impact |
|---|---|---|
| Frequency Transmission | Low-end frequencies travel through building structures | Noise complaints, recording issues |
| Neighbor Complaints | Disturbance to neighbors due to loud drumming | Restricted practice times |
| Recording Difficulties | Drum sound overpowers other instruments during recording | Poor recording quality |
Benefits of Proper Drum Isolation
Proper drum isolation greatly improves recording quality. It reduces sound transmission and minimizes neighbor disturbances.
Isolation platforms are a budget-friendly option. They are better than full room treatments or soundproofing for drummers on a tight budget.
Planning Your DIY Drum Isolation Platform
Creating a DIY drum isolation platform is key for great sound. Before you start, planning is vital for success.
Measuring Your Drum Kit's Footprint
First, measure your drum kit's footprint carefully. Don't just look at the space it takes up. Also, think about room for playing, like cymbal swing and drummer movement. Note down the dimensions and any special needs for your kit.
Choosing the Right Size and Design
Then, think about the size and design of your platform. You might need a simple shape or something more complex for your setup. The design should fit your space and sound needs.
Budget Considerations
Lastly, think about your budget. Prices for drum isolation platforms vary a lot. You can find cheap options or invest in a professional one. Here's a cost guide:
| Component | Budget Option | Mid-Range Option | Professional Option |
|---|---|---|---|
| Platform Base | $50 | $100 | $200 |
| Isolation Material | $20 | $50 | $100 |
| Additional Features | $0 | $50 | $100 |
| Total | $70 | $200 | $400 |
By thinking about these points, you can make a DIY drum isolation platform that fits your needs and budget.
Materials and Tools You'll Need
Building a drum isolation platform needs careful planning and the right tools. We'll list the key materials and tools you'll need for success.
Essential Building Materials
The base of your drum isolation platform must be strong. You'll need:
- Plywood sheets (¾-inch recommended for durability)
- 2x4 lumber for framing
- Screws of various sizes
- Wood glue
- Finishing materials like carpet or rubber matting for the top surface
Choose materials that balance quality and cost to keep your project affordable.
Sound Isolation Materials
To block vibration, you'll need specific materials. Options include:
- Rubber isolation pads
- Tennis balls (for floating designs)
- Neoprene sheets
- Mass-loaded vinyl
- Acoustic foam
We'll look at each material's effectiveness, cost, and availability to guide your choice.
Required Tools
To build your drum isolation platform, you'll need various tools. These include:
- Power tools: circular saw, drill/driver, jigsaw
- Hand tools: measuring tape, square, level, utility knife
While a full set of tools is best, we'll also suggest simpler options for those with limited tools.
Safety Equipment
Always prioritize safety when building your drum isolation platform. Use:
- Safety glasses
- Hearing protection
- Dust masks
- Work gloves
Wearing this safety gear properly will help avoid injuries during construction.
How to Build a DIY Drum Isolation Platform (Cheap and Easy)
Now that we have our materials and tools ready, let's start building a DIY drum isolation platform. This guide will help you create a drum isolation solution that works well.
Step1: Creating the Base Frame
To begin, we need a sturdy base frame for our drum isolation platform. We'll use 2x4s for this. First, measure your drum kit's footprint to figure out the platform's size. Cut four 2x4 pieces to the needed length for the sides of the frame.
Assemble the frame by screwing the pieces together at the corners. Use 3-inch wood screws. Apply wood glue to the joints for extra strength. Make sure the frame is square by checking the diagonals.
Key Considerations:
- Use pressure-treated wood for durability.
- Pre-drill screw holes to avoid splitting the wood.
- Use corner brackets for extra stability.
Step2: Installing the First Isolation Layer
The first isolation layer is key for reducing vibrations. Cut rubber isolation pads or vibration-dampening materials to size. Attach these to the base frame, spacing them evenly.
If using tennis balls for a floating design, place them at the corners and center of the frame. Secure them using a strong adhesive or screws, depending on the material. This layer is essential for decoupling the drum kit from the floor.
Tip: Ensure the isolation material is not too compressed, as this can reduce its effectiveness.
Step3: Constructing the Platform Surface
Cut a piece of plywood to fit the frame, leaving a small gap around the edges. This will be the surface of your drum isolation platform. If necessary, create cutouts for drum pedals or other obstructions.
Secure the plywood to the frame using screws, making sure it's tightly attached. You can add additional support underneath if needed.
Step4: Adding the Top Dampening Layer
To further reduce vibration and sound transmission, add a top dampening layer. This could be carpet, rubber matting, or specialized acoustic materials. Cut the material to size, ensuring it covers the entire surface.
Attach it using an appropriate adhesive, and trim any excess material from the edges.
| Material | Effectiveness | Cost |
|---|---|---|
| Carpet | Medium | Low |
| Rubber Matting | High | Medium |
| Acoustic Panels | Very High | High |
Step5: Securing All Components
Once all layers are in place, check the platform for any loose parts. Tighten any screws or bolts as needed. Add reinforcement if necessary to ensure the platform remains stable during use. This step is key for safety and performance.
Step6: Finishing and Weatherproofing
Lastly, consider adding a finish to your drum isolation platform to protect it from wear and tear. You can stain or paint the wood, or apply a weatherproof coating if you plan to use the platform in a humid or outdoor environment. Ensure all edges are protected, and the platform is safe to use.
By following these steps, you'll have a functional DIY drum isolation platform. It effectively reduces sound transmission and vibration. This project is not only cost-effective but also customizable to your specific needs.
Advanced Construction Techniques
Advanced construction techniques help drummers make better DIY drum isolation platforms. By using smart design, drummers can make their platforms work better.
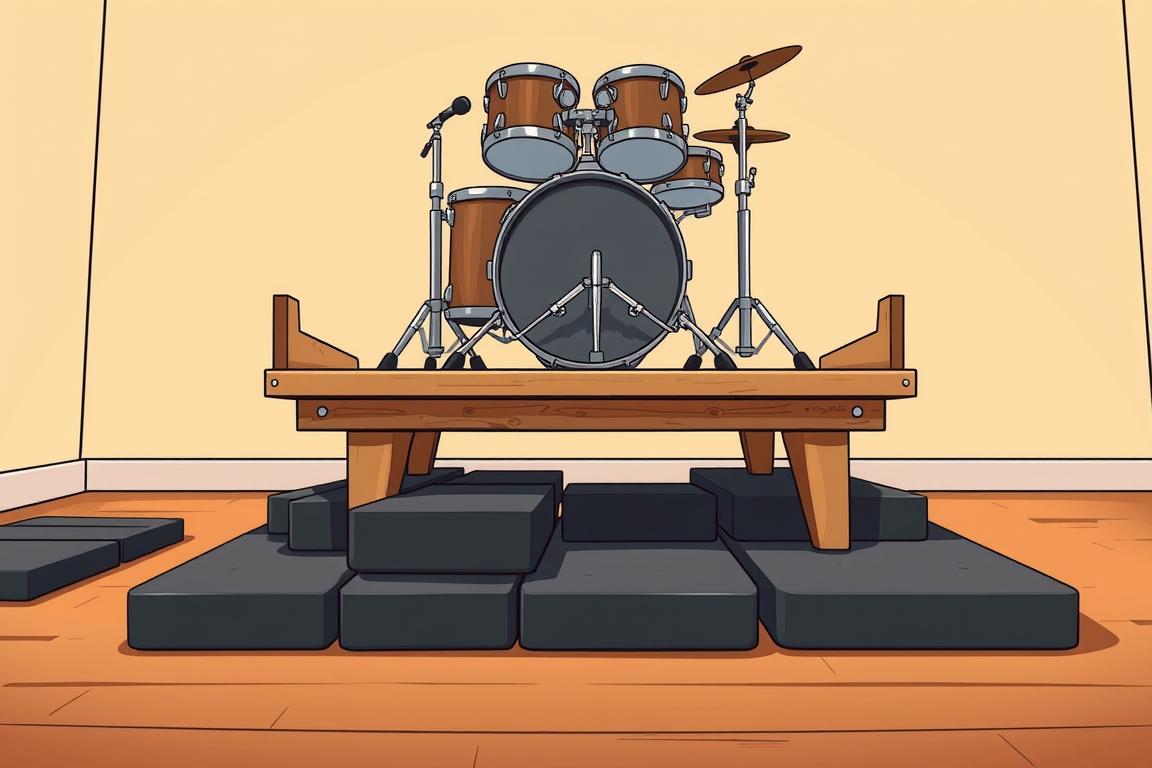
Creating a Floating Design
To make a floating design, you need to separate the drum platform from the floor. This stops vibrations from getting through. You can use tennis balls, specialized isolation feet, or spring systems for this.
Put the isolation elements under the platform's corners for even weight. For tennis balls, start with 12 inches apart. The aim is to find the right balance between stability and isolation.
Adding Multiple Isolation Layers
Building a "sandwich" of materials is another way to improve isolation. Start with a base of plywood or MDF. Then add a layer of rubber or neoprene for dampening.
Keep alternating between rigid and dampening layers. This targets different frequency ranges, making the platform better at isolating sounds. Adding a sealed air chamber can also help a lot.
Testing Your Drum Isolation Platform
After building your DIY drum isolation platform, it's key to test it. This ensures it works well, isolating your drum kit as needed.
Testing covers sound and vibration. Let's look at how to do these tests.
Sound Transmission Tests
To check sound, measure decibel levels in nearby rooms before and after setting up your platform. Use recording gear or apps on your phone. Consistent test patterns, like single strokes on different drums, help compare results and spot issues.

Vibration Checks
Vibration tests measure floor and wall vibrations. Try placing water glasses nearby to see if they ripple. For better accuracy, use contact microphones or vibration meters. These tools show if your platform is isolating enough for your setup.
Customizing Your Platform for Different Setups
Customizing your DIY drum isolation platform is key for the best sound. It works well with both electronic and acoustic drums. Tailoring it to your needs is essential.
Adapting for Electronic Drums
Electronic drums need special care for isolation. They make less sound in the air, so focus on reducing vibrations. Use targeted isolation under pedals to help.
Smaller platforms and lighter materials can also work well. They keep the platform effective without adding too much weight or cost.
Modifications for Acoustic Kits
Acoustic drum kits come in many sizes and shapes. You might have a small jazz setup or a big rock kit. A modular platform design can grow or change with your drums.
Adding special spots for the bass drum and throne can make it better. By using the same building methods, you can make your platform fit your drums and space perfectly.
Troubleshooting Common Issues
Even with careful planning, DIY drum isolation platforms can sometimes encounter issues. These problems can affect their performance. When building a DIY drum isolation solution, it's key to spot and fix problems early.
Fixing Insufficient Isolation Problems
Insufficient isolation can stem from several causes. This includes not enough isolation materials or acoustic bridging. To solve this, add more isolation layers or remove direct contact points between the drum kit and the floor. Using damping materials in the right spots can also help.
| Cause | Solution |
|---|---|
| Inadequate isolation materials | Add more isolation layers |
| Acoustic bridging | Eliminate direct contact points |
Addressing Platform Stability Issues
Platform stability problems, like wobbling or creaking, can be fixed. Reinforce weak spots and make sure the platform is level. Also, ensure all parts are tightly fastened to stop squeaks and improve stability.
By following these steps, your homemade drum isolation platform or affordable drum platform will work better. It will also stay stable during intense playing.
Budget-Friendly Alternatives
It's possible to get quality drum isolation without spending a lot. With a little creativity, you can make an effective isolation platform even on a tight budget.
Using Recycled Materials
One smart way to save money is by using recycled materials. Look for useful items in construction site dumpsters (with permission), use pallet wood, or repurpose old furniture. You can also find free materials online or through local groups.
For example, old pallets can be broken down for your platform's frame or base. Make sure the wood is strong and not too damaged. Old furniture can also be adapted to fit your drum kit's size.
Simplified Design Options
Another cost-saving idea is to keep your design simple. You don't need fancy or expensive setups to get good isolation. Try a single-layer platform with isolation materials like rubber or cork under key drum areas.
Carpet padding is another affordable option. It's not as good as professional materials, but it helps reduce vibration and sound. You can also focus on isolating just the kick drum for a simpler, yet effective solution.
Conclusion
Building a DIY drum riser is a big win for drummers. It helps cut down on noise and boosts recording quality. This project is affordable and lets you play whenever you feel like it.
A homemade drum riser can be made to fit your space and needs. It's perfect for small studios or shared living areas. It improves sound and keeps noise down, making it a great choice for drummers.
Doing this project makes your playing better and helps you get along with others. It's also rewarding to create something that works for you. So, start making your own drum isolation platform today.
FAQ
Q: What materials are best for building a DIY drum isolation platform?
Q: How do I measure my drum kit's footprint for the platform?
Q: Can I build a drum isolation platform on a tight budget?
Q: How do I test if my DIY drum isolation platform is working effectively?
Q: Can I customize the drum isolation platform for electronic drums?
Q: What are common issues with DIY drum isolation platforms and how can I fix them?
Q: Is it necessary to use specialized acoustic materials for sound isolation?
Q: How can I make my drum isolation platform more stable?
Q: Can I build a floating drum isolation platform, and is it worth the effort?
DISCLAIMER
This document is provided for general information purposes only and should not be relied upon as providing legal advice, technical, or specific operational guidance to the reader, whether as to the practices described in the document or the applicable legal requirements and regulations. Percussion Pros expressly disclaims any responsibility for liability arising from or related to the use or misuse of any information in this document.